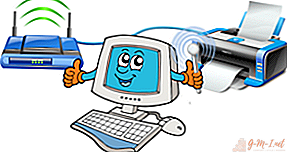
The main advantage of a network printer over a regular one is its ability to cope with a large amount of work. Office workers often have to deal with the problem of printer overload.

How to make a printer network
First you need to fix the technical part of the question. To do this, you will need a PC, a printing device with drivers, as well as other PCs that need to print documents. On the computer to which the usb cable is connected, you need to make sure that there are drivers for the connected device to work correctly. Then you need to properly configure the settings. Personal computers connected to the network should be in the same working group, have personal names.

Working on windows 7
In this system, making adjustments is quite easy. First you need to make sure that the connected PCs on the same network are located in the same workgroup. According to system settings, it is called that. Then you need to disable the password request function. It is necessary to go to the control panel, to the center of networks. On the left, select the line “Change settings”, left-click on it. In the pop-up dialog box, make sure that the parameters are correct. If you need to provide unlimited access to connected users, you need to check the box “Disable sharing with password protection”.
Then you need to open the tab "Devices and Printers", this is done through a search in the start. In the pop-up dialog, you must select the device where you want to perform operations. Right click, go to "Properties". Then you need to go to access, open access settings. The record control dialog will be displayed, in which it is necessary to allow making changes on the PC. Next, in the properties, set a check mark next to the “access” line, then you will need to think up and enter the network name for the device.
We work on Windows 10
To provide unlimited access to several computers to one device via the network, you need to make a number of settings. The easiest way is through the "Parameters" section.
- You must select the item "Devices", select a device.
- Right-click on it, select "Properties", go to access.
- In the pop-up dialog, it is necessary to set a mark next to the line “Sharing”.
Correction of parameters is completed.

How to share a printer on a Windows 10 network
You need to activate the access center networks. You must activate the discovery options, as well as sharing all files. To do this, go to the adapter properties, check for a checkmark opposite the corresponding line. In addition, it is recommended to go into the service management, find "Publishing resources" there, launch it, check the box in the corresponding field near the "Autostart" line.
After that, you can proceed to the basic configuration of the device. We open the parameters, go to the "Devices" section, then "Printers and Scanners". There, click on the desired device, in the pop-up window, click on "Management". A window will open, there you need to select "Printer Properties", then you need to go to the "Access" tab, there, near the access line, you need to put a mark. On the connected computers, you need to enable the "Render print jobs" setting.
Set up sharing
First you need to configure the network, how to do it correctly is written above. You need to make sure that all PCs are connected to the same workgroup, located on the same network. To check that everything is configured correctly, you can go to the explorer. In the network tab, computers located on the same local network will be shown. If in addition to the network administrator there are no other PCs, it means that some settings were made incorrectly.
In addition to the network nuances, you must make sure that the necessary drivers are installed on the computer to which the peripheral device is connected via cable, which will ensure high-quality, uninterrupted operation of the device.

How to share a printer on a Windows 7 network
We launch the explorer in the “Network Places” tab, if the network is configured correctly, the connected computers will be displayed.
 Left-click on the desired PC, if everything is configured correctly, the printer will be displayed in the pop-up dialog. We click on it with the right button, select the “Connect” item from the list, click on it. The connection takes place within a minute, after the connection is established, all the drivers are configured immediately.
- After that, in the control panel, in the "Devices" tab, you need to find the connected device, right-click on it, select "Use by default"
- After the operations, in any text or graphics editor, when you click on the "Print" button, the files will be sent to a printer connected to the local network, you only need to confirm the fact of the operation.
 Left-click on the desired PC, if everything is configured correctly, the printer will be displayed in the pop-up dialog. We click on it with the right button, select the “Connect” item from the list, click on it. The connection takes place within a minute, after the connection is established, all the drivers are configured immediately.
If any error occurs when connecting the printer to the PC, for example, “Windows cannot connect to the printer” or any error code is displayed, the following operations should be performed.
The solution is quite easy, it actually helps in 100% of errors that occur. You need to open the control panel, then find "Computer Management" there. In the window that opens, find the "Services" tab. Already in this window a complete list of active services will be presented. Among them, you need to find the "Print Manager", right-click on it, select "Stop". After that, you must restart the computer. Then, repeat the procedure for connecting the printer to the LAN.
How to add a printer to the network
 When trying to connect to a computer using a usb cable, you must specify that this is a "Local Printer". Particular attention should be paid to the fact that without the appropriate drivers for the device, it will not work. They are located on the disk, which should be in the box with the device. If there is no driver disk, they can be easily found and downloaded on the Internet. After downloading install. When the installation process is completed, you need to go to the settings dialog box, often it is immediately displayed. There you need to put a checkmark next to the line “Access Permission”. This means that other computers that are connected to the network on the same network as the printer can use it.
To verify the settings, you need to print a test page using a computer that does not have a direct connection to the device.
Difficulties setting up a network printer
- The most common difficulty when trying to connect the printer to a local network where several computers are already located is the lack of a printer in the Network Neighborhood tab. This can be caused by a number of reasons, the first is incorrect settings for connecting the printer to the network. Perhaps, somewhere, the user forgot to check the box next to the line, providing shared access to the device. First of all, you need to check all the settings of the printer, the computer to which it is physically connected via a usb cable, or to the administrator computer of the local network when connecting via Bluetooth. Most likely, something is indicated incorrectly.
 The second reason, the printer is in another workgroup on the local network. This is easily fixed, you just need to connect it to the desired workgroup, where all the computers are located.
- The third reason is a little more complicated, is the lack of proper software or its incorrect installation. It is necessary to reinstall the drivers for the connected device, and also check for malicious files and programs in the system.
- The fourth reason is the most serious, it lies in problems with the physical connection to one of the computers. Perhaps the problem lies in the usb cable, in order to check this, you can try using another one. If everything is OK with the cable, then the problem is with the internal components of the printer or the problem lies in the usb port of the computer to which the printer is connected. In order to fix this problem, you will have to use the service of a wizard or if the breakdown is serious, you can take the printer for repair under warranty.
 The second reason, the printer is in another workgroup on the local network. This is easily fixed, you just need to connect it to the desired workgroup, where all the computers are located.
Leave Your Comment